Our integration with Klaviyo enables you to sync shipping events and status updates with your Klaviyo account. You can use these as part of your Klaviyo email flows and to personalise emails.
Set up Klaviyo in Starshipit
- In Starshipit, navigate to Settings > Tracking and notifications.
- Scroll down to Set up Klaviyo.
- Tick the checkbox next to Enable Klaviyo.
- Click Connect with Klaviyo.
How to create an email notification flow in Klaviyo
-
Sign in to Klaviyo.
-
Navigate to Flows.
-
Click Create Flow.
-
Click Create from scratch.
-
Enter a name for the flow and click Create Flow.
-
To set the notification trigger, select Metric.
-
From the dropdown menu, select Starshipit Tracking status.If you don't see this option, read this troubleshooting step.
-
Click Done.
-
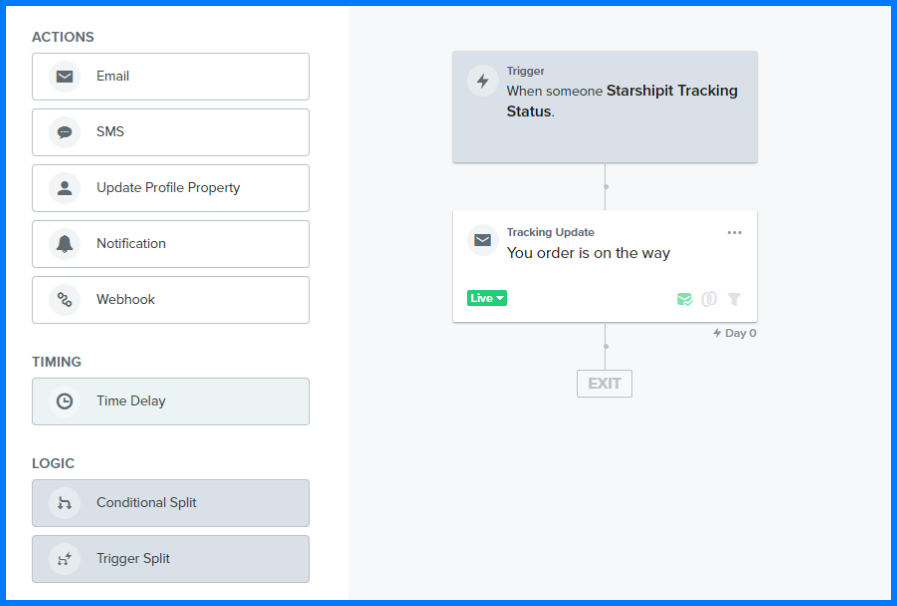
Drag and drop the Email option into the flow.
-
To make edits, click on ... and then select Edit within the email action.
-
To customise your email content, you can use the following dynamic variables:\
Order Number -> {{ event.orderNumber|default:'' }}
Carrier -> {{ event.carrier|default:'' }}
Tracking Status -> {{ event.trackingStatus|default:'' }}
Tracking Number -> {{ event.trackingNumber|default:'' }}
Tracking URL -> {{ event.trackingUrl|default:'' }}
New Branded Tracking Page URL -> "https://app\.starshipit\.com/BrandedTrack\.aspx?code=\{\{ event.trackingNumber|default:'' }}"
Classic Tracking Page URL -> "https://app\.starshipit\.com/track\.aspx?code=\{\{ event.trackingNumber|default:'' }}"
-
Click on Review and Turn On to activate the notification.
-
Click Exit when you've finished.
How to trigger different emails based on tracking status
- Sign in to Klaviyo.
- Navigate to Flows.
- In the Logic section, choose Trigger Split and drag it beneath the trigger action.
- In the Configuration settings, click on Dimension.
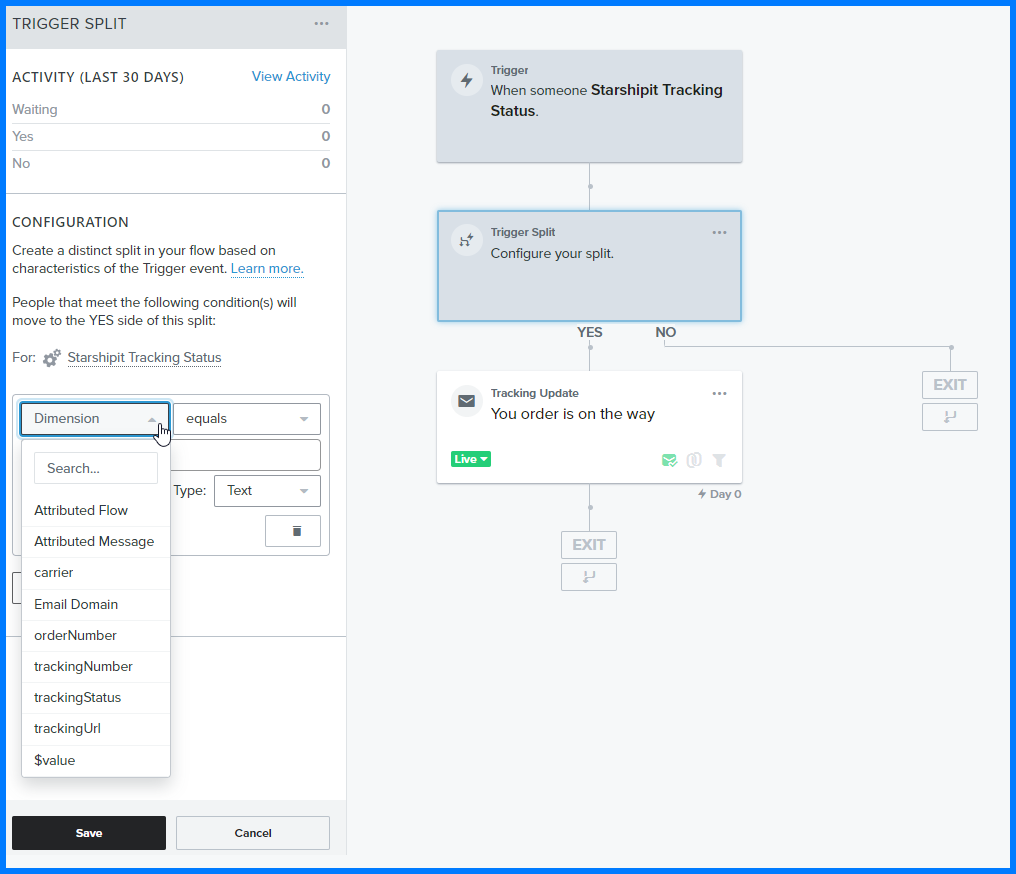
- Click trackingStatus.
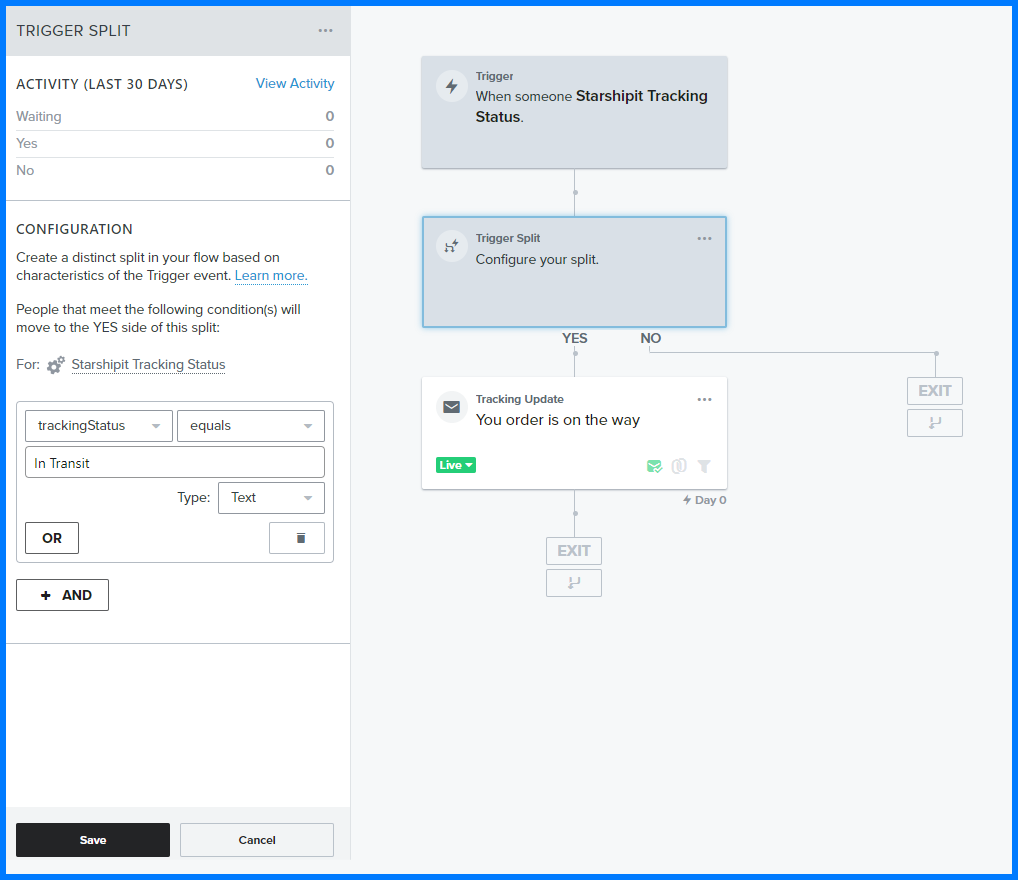
- Input the tracking status and the condition that should prompt the notification.
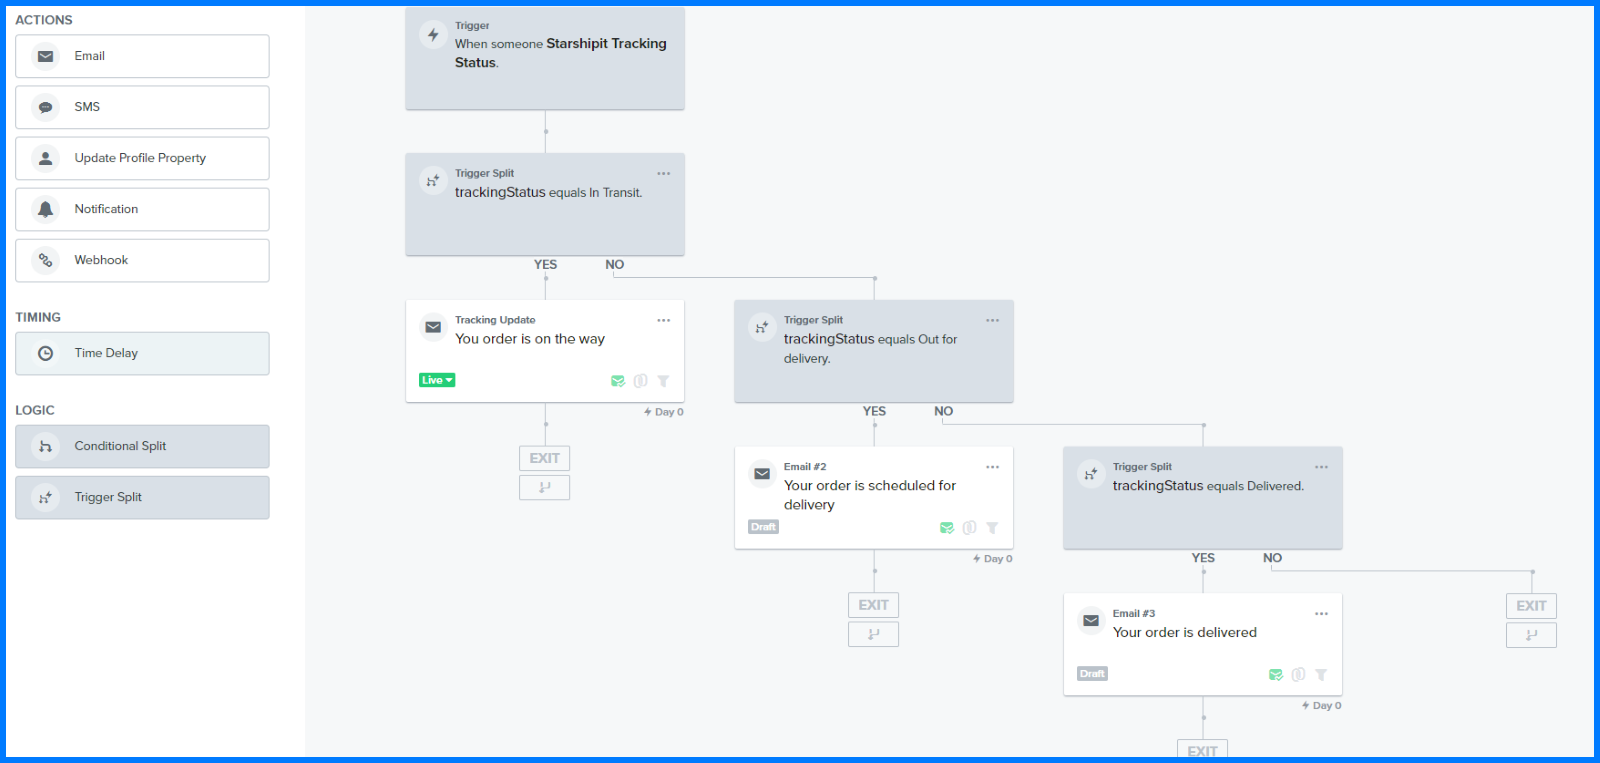
- Repeat the process of adding a trigger split for each tracking status that requires a notification.
FAQs
Starshipit sends tracking updates to Klaviyo instantly once it receives updated information from the supported carrier.
Starshipit triggers Klaviyo updates during the following stages:
- Printed
- Dispatched
- In Transit
- Out for Delivery
- Delivered
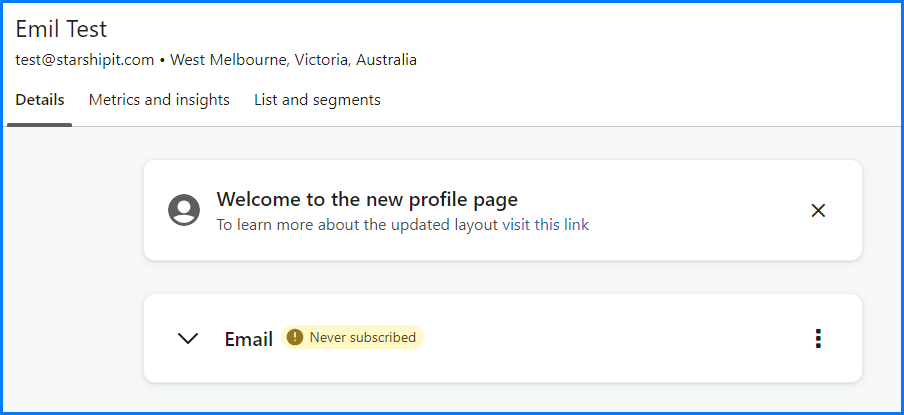
Yes. If you don't have a profile, Klaviyo will automatically create a user profile when an update is pushed through. However, this automatic profile will be treated as a non-subscriber, meaning they won't receive any notifications.
Troubleshooting
Why is 'Starshipit Tracking Status' not showing in my Klaviyo drop-down menu?
'Starshipit Tracking Status' will appear in your Klaviyo metric dropdown after the first event update from Starshipit to Klaviyo. To trigger this update, initiate the shipment of an order (e.g., print the shipping label) and the Starshipit Tracking Status should show in the metric dropdown. If you still encounter issues, contact our support team here for assistance.
What tracking information does Starshipit send to Klaviyo?
Starshipit transmits the following details:
- Tracking Status
- Order Number
- Carrier
- Tracking Number
- Tracking URL
My customers aren't receiving emails. What could be causing this?
Several factors could cause this situation:
- Your Klaviyo connection may be invalid or expired. Reconnect Klaviyo from Starshipit settings.
- The customer's profile might not be subscribed to emails.
- Smart sending could be enabled. You can find more details in the Klaviyo Help Center.