1. Download and install the Print Client for Windows
- In your Starshipit account, select Settings, then select Desktop App (UI 2.0) or Printing (Classic UI).
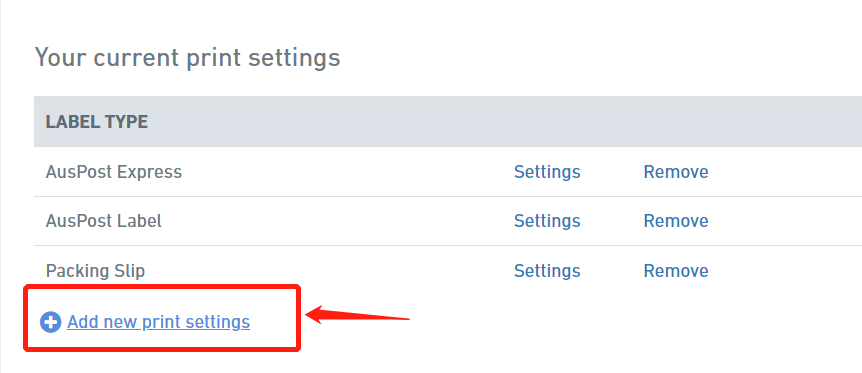
- Select the advanced tab, then select Add new print settings or Settings under a label type.
- Now click Download Print Client for Windows or Mac.
- For Windows: To install the setup file, follow the steps in the installation wizard.
- For Mac: Drag and drop the Print Client icon to the Applications Folder.
2. Connect the Print Client
-
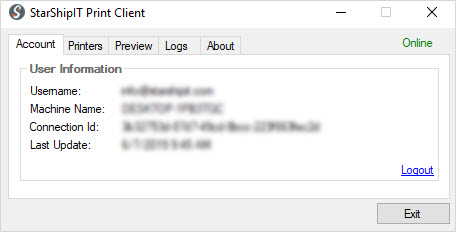
Run the Print Client application on your computer.
-
Copy and paste the authorisation code from the page where you selected Add new print settings and selected your carrier name to create a Label Type in the very first step.


-
Paste your authorisation code in the Print Client application.
-
Select the printer.
-
Open the Print Client from the system menu bar.
- For Mac users: You can find this in top right of your screen.
- For Windows users: It is in the system tray in the bottom right of your screen.
Make sure the connection is successful by checking the green Onlinestatus in the Print Client.

3. Assign a label type to the Print Client
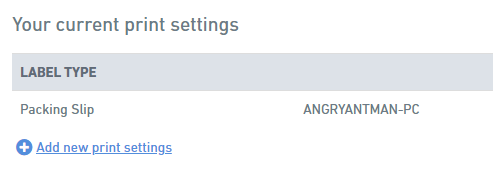
Assign a label type (in this example the "Packing Slip") to the computer where the Print Client is installed.
- Go to Settings, selectPrinting, then select the Advanced tab.
- Click Add new print settings.
- Select the label type (e.g. Packing Slip).
- Select the Format, and set Print Client as the Print Method.
- Select the Machine that the Print Client is set to.
- Click Save.

4. Assign a printer to the Print Client
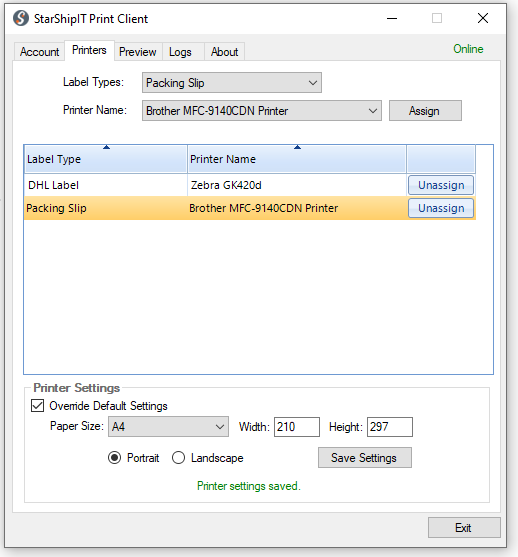
- Open the Print Client on your computer.
- Go to the Printers Tab.
- In the Label Type, select Packing Slip.
- Select the Printer Name to print the Packing Slip e.g. Brother MFC-9140CDN.
- Click Assign.
5. Check paper size and orientation
Check if the page parameter corresponds to the printer and the page loaded in the printer.
- Click on the Label Type and Printer Name.
- Check the Paper Size e.g. A4 for Packing Slip, and page orientation.
- Click Save Settings.
